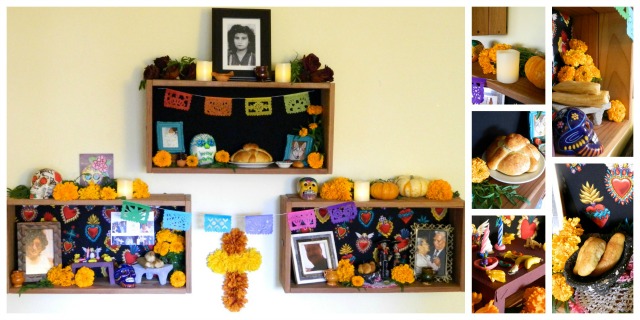
Last year was our first time celebrating Día de Muertos. Since then, a lot has changed in the way I see this holiday. It amazes me how much of a spiritual impact the celebration of Día de Muertos has given me. Last year I didn’t know much about it, so I did a little research, applied what I learned to the same beliefs that my husband and I grew up with, and did my best to weave the old with the new. After having experienced all the emotions and joy that come with setting up and creating an altar last year, I was looking forward to getting started on our altar this year once Fall officially arrived.
What this year’s altar means to me is beyond the expectations of what I first expected to feel. I knew that it had to be meaningful from start to finish, and it was. There was no doubt in my mind that it needed to be separate from everything else, and it needed its own space where it can be appreciated. Last year I was left feeling like I didn’t do our altar justice, so this year I wanted to make our deceased relatives proud. My goal was to create the foundation for an altar that would last us many years. I wanted it to stand out and be noticed by everyone who walked through our door. Most importantly though, I wanted my children and husband to be a part of the whole process too.
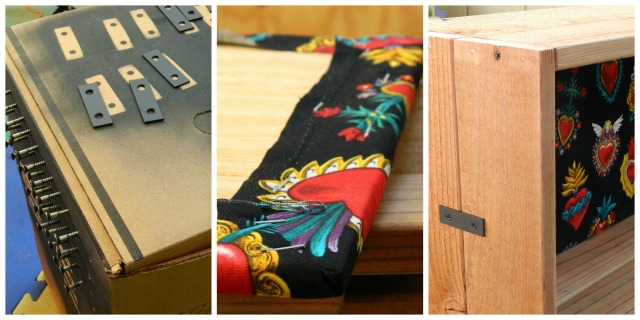
After much brainstorming and planning, we began gathering all the materials we needed together. My husband took on the challenge of building the home of our altar(s), which were three large rectangular shadow boxes that would be hung on the wall. The wood we used came from the box frame of our old bed that we took apart over the summer and saved before throwing out what we couldn’t repurpose.
Here is a detailed list of the materials we used for the shadow box shelf:
- (4) 11 5/8“ Long X 11/16” Thick X 3 3/8” High solid redwood boards
- (4) 21 ¾” Long X 11/16” Thick X 3 3/8” High” solid redwood boards
- (1) 22 7/8” Long X 3/8” Thick X 11” High plywood board for the back
- #6 x 1-1/4” wood screws
- #6 x ½” wood screws
- #16 x 1-1/4” Wire Brads nails
- (4) 2” rectangle brackets
- Staple gun
- fabric
- ¼” thick Quilt Batting
- Picture hangers (20lb capacity)
- ring hangers
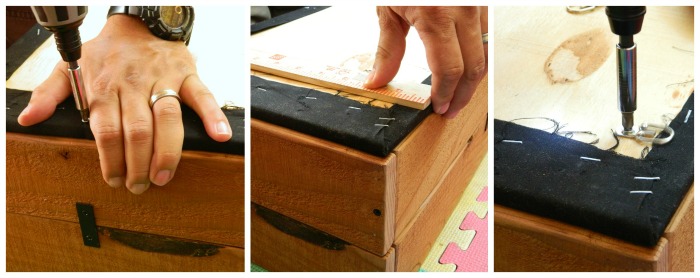
Step 1: Cut the Batting at least ½” bigger than the plywood board, and the fabric at least 1 ½” bigger than the plywood board. Lay down the fabric face down first, then place the batting over the fabric, then place the plywood board over them. Starting with the middle (lengthwise), pull the fabric up and over the edge of the board, and staple it down. Do the same with the other sides. Work your way from the middle – out, leaving the corners last. When you get to the corners, fold the leftover piece of fabric that hasn’t been stapled like you would a present, and staple it down one or two times.
Step 2: Build two frames separately using the nails first (the shorter redwood boards go on the outside of the frame). Once you have the frames built, reinforce them with the #6 x 1-1/4” wood screws (one on each end between the nails). Screw on half of the bracket halfway down the middle of each board with one #6 x ½” wood screw. Slide the second frame onto the frame with brackets and secure them together with #6 x ½” wood screws again.
Step 3: Evenly position the upholstered plywood board over one side of the completed frame and secure it onto the frame using the #6 x 1-1/4” wood screws.
Step 4: Use a ruler to measure how far down, as well as how much inward, you want the picture hangers to be on the back board. Screw them on with the #6 x ½” wood screws. Use the distance between the top of the two rings to determine how far apart you need to place the hangers on the wall.
Now that the hardest part is done, it’s time to get creative! If you’re going to include children in the process of creating an altar for Día de los Muertos, here are a few tips.
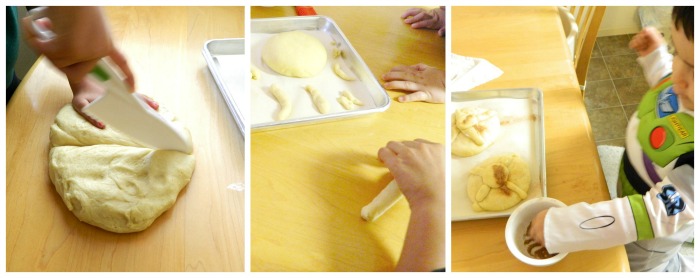
- Find age-appropriate books about Día de los Muertos to introduce them to the cultural festivities if this is their first time. Talk about the pictures, note the basics as a starting point (i.e., Marigolds, the offering, Calaveras, etc.). Then talk about who you will be honoring in your altar.
- Scope your home out for the right spot together as a family and talk about the different options you have. How much space are you going to need? How much space do you have? Do you want it to be on a table, or on the wall, which room should it be in?
- Once you’ve decided where the altar will be, you can ask the children to draw a picture of some of their ideas. If they don’t want to do this, or are too young to understand, it’s okay! Simply talking about it together can be enough. Just make sure you jot down some of their ideas (if they give you some) so you can plan for them ahead for time. Remember, this is a FAMILY DIY Project! Everyone’s ideas and participation count! No matter how big or small.
- This one can probably go without saying, but I’m going to say it anyway…Keep breakables and flammables to a minimum! Children are naturally curious, and they will want to touch everything on the altar, so don’t put anything on the altar you would be upset about if it gets broken. If you do, educate them on how to handle those items with care. Lay down some rules if you must.
- Have fun, be patient, and take your time. Building an altar isn’t something to rush. It’s a personal matter that involves lots of love, and only you and your family know what will work and what will not. Small, large, simple, elaborate… doesn’t matter. What matters is the time spent together bonding with your loved ones – alive and departed.
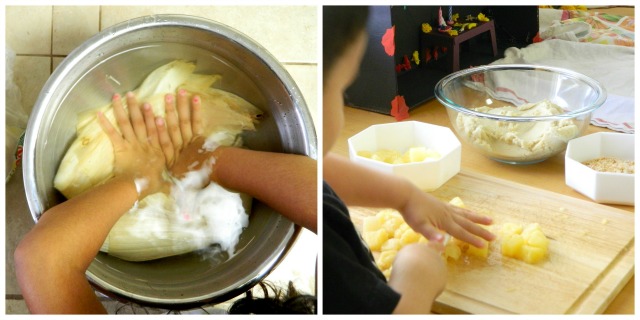
Watching my daughter get excited about helping us with our altar made every bit of hard work putting it all together worth it. This year we talked about her Grandmother more, she asked about the others; who they were, how they died. “Do we miss them?” she always asks. Hearing and answering these questions does reawaken the grief and sadness in us, but only for a short while. It’s part of the process I guess, because you can NEVER forget about the people you love and miss. Never! We don’t want to forget about them! I think that’s why it’s so important to me to do this every year for my family. It’s the only way my children can get to know their Father’s Mother and it helps keep the memories of her alive. For that reason alone, I am beyond more than happy to continue this tradition every year.
I hope you enjoyed reading our experience. Below are links to recipes and resources that we used to help us build our altar as a family.
Books about Día de los Muertos
Pan De Muerto recipe by King Arthur Flour
Sweet Tamales by Muy Bueno Cookbook


¡Me gusta!
They’re beautifully, a unique way to set-up an altar.
Thank You Rachel!
QUE Lindo quedo! Es muy importante enseñarles a nuestros hijos nuestras tradiciones para que no se pierdan. Thanks to share!
Saludos Marlene, http://www.supermamalatinablog.com